Local development environments are as unique as the developers that work on them. But that’s not exactly right. Local development environments should be as unique as each group of developers that work on them. Every developer on a team should be spinning up the same environment in the same way.
I’ve been using Local as my local development environment for WordPress for the last few years. It worked well until my team started to grow. Now it has become hard get someone up and running quickly. There were too many things to install and everyone had to manage their own installation.
So after a couple weeks of exploring (which I wrote about it this post), I landed on Lando. A huge shout out to the fine folks at Rareview for introducing me to this great tool. We build on the shoulders of giants so it’s always good to celebrate those you learn from.
Here’s what we will be setting up:
-
A WordPress environment with:
-
PHP 8.2
-
MySQL database
-
Redis
-
Running on Nginx
-
-
Composer to manage plugins and themes
-
WP-CLI
-
Mailhog for testing emails
Alrighty, lets get started.
Install Docker and Lando
Lando is an abstraction layer on top of Docker. So you need to install Docker. Luckily the Docker and Lando documentation is pretty good. Follow them to get everything installed and then come back to this post once you’re done.
Get the WordPress environment set up
With everything installed we can now move on.
Lando works on the concept of a lando.yml file. This file contains all of the configuration for our environment. Lando also has this concept of recipes. Recipes are a combination of services and tooling that you can set for the environment. And Lando has one for WordPress.
The WordPress recipe is great, it comes with:
-
PHP
-
Your choice of webserver (Apache or Nginx)
-
Your choice of database (mariadb, mysql, postgres)
-
Composer
-
WP-CLI
-
xDebug
To get started, create a lando.yml file in the root of your project and add the following
name: my-wp-starter
recipe: wordpress
config:
  php: 8.2
  composer_version: 2
  webroot: .
  database: mysql
  cache: redis
  ssl: false
  via: nginx
  xdebug: true
Lets break this down.
name is the name of the project.
recipe is the recipe we want to use
config is where you can define settings for your specific setup. In our setup, we are doing a few things:
-
php is set to use version 8.2
-
Composer version is set to 2
-
webroot is set to the root of the project, this is where WordPress should be (should be not is, we’ll get to that later) installed
-
The database is set to use mysql with Redis as the object cache
-
SSL is false as we don’t have a cert to use in this setup
-
the
viakey tells Lando what web server to use when serving the website, in our case it’s nginx -
xdebug is on
From here you can run lando start in your terminal and Lando will work with Docker to set up the environment. But this only sets up the environment, you still need to install WordPress.
Instead of manually downloading WordPress and installing it ourselves, we will automate this using some bash scripts and Lando’s build steps feature.
Automate installing WordPress
Lando gives us something called build steps. Build steps are things that happen when you build a Lando environment for the first time. There are different build steps for different points in time.
The cool thing here is that you can use build steps to run bash scripts. So let’s do this to automate downloading and installing WordPress.
Add the following to the lando.yml file
services:
  appserver:
    build:
      - cp wp-config-local.php wp-config.php
    run:
      - .lando/run.sh
Your lando.yml file should now look like this
name: my-wp-starter
recipe: wordpress
config:
  php: 8.2
  composer_version: 2
  webroot: .
  database: mysql
  cache: redis
  ssl: false
  via: nginx
  xdebug: true
services:
  appserver:
    build:
      - cp wp-config-local.php wp-config.php
    run:
      - .lando/run.sh
Lets unpack what’s going on here.
Lando works off the concept of services, an environment built on Lando might have one service for the app, one service for the server and one service for the database. We can run lando info to see the services in use and what their names are.
The service that runs WordPress is named appserver. So we configure a few things to happen at the build step and the run step.
The build step happens before the environment is run. The script we added will copy ‘wp-config-local.php’ to ‘wp-config.php’. We haven’t set that up yet so lets do it now. Create a local wp-config-local.php file and add the following to it:
<?php

/**
 * The base configuration for WordPress
 *
 * The wp-config.php creation script uses this file during the installation.
 * You don't have to use the website, you can copy this file to "wp-config.php"
 * and fill in the values.
 *
 * This file contains the following configurations:
 *
 * * Database settings
 * * Secret keys
 * * Database table prefix
 * * ABSPATH
 *
 * @link <https://wordpress.org/documentation/article/editing-wp-config-php/>
 *
 * @package WordPress
 */

// ** Database settings - You can get this info from your web host ** //
/** This will ensure these are only loaded on Lando  */
if (getenv('LANDO')) {
	/** The name of the database for WordPress */
	define('DB_NAME', 'wordpress');
	/** MySQL database username */
	define('DB_USER', 'wordpress');
	/** MySQL database password */
	define('DB_PASSWORD', 'wordpress');
	/** MySQL hostname */
	define('DB_HOST', 'database');

	/** URL routing (Optional, may not be necessary) */
	// define('WP_HOME','<http://mysite.lndo.site>');
	// define('WP_SITEURL','<http://mysite.lndo.site>');
}

/** Database charset to use in creating database tables. */
define('DB_CHARSET', 'utf8');

/** The database collate type. Don't change this if in doubt. */
define('DB_COLLATE', '');

/**#@+
 * Authentication unique keys and salts.
 *
 * Change these to different unique phrases! You can generate these using
 * the {@link <https://api.wordpress.org/secret-key/1.1/salt/> WordPress.org secret-key service}.
 *
 * You can change these at any point in time to invalidate all existing cookies.
 * This will force all users to have to log in again.
 *
 * @since 2.6.0
 */
define('AUTH_KEY',         'put your unique phrase here');
define('SECURE_AUTH_KEY',  'put your unique phrase here');
define('LOGGED_IN_KEY',    'put your unique phrase here');
define('NONCE_KEY',        'put your unique phrase here');
define('AUTH_SALT',        'put your unique phrase here');
define('SECURE_AUTH_SALT', 'put your unique phrase here');
define('LOGGED_IN_SALT',   'put your unique phrase here');
define('NONCE_SALT',       'put your unique phrase here');

/**#@-*/

/**
 * WordPress database table prefix.
 *
 * You can have multiple installations in one database if you give each
 * a unique prefix. Only numbers, letters, and underscores please!
 */
$table_prefix = 'wp_';

/**
 * For developers: WordPress debugging mode.
 *
 * Change this to true to enable the display of notices during development.
 * It is strongly recommended that plugin and theme developers use WP_DEBUG
 * in their development environments.
 *
 * For information on other constants that can be used for debugging,
 * visit the documentation.
 *
 * @link <https://wordpress.org/documentation/article/debugging-in-wordpress/>
 */
define('WP_DEBUG', false);

/* Add any custom values between this line and the "stop editing" line. */

/* That's all, stop editing! Happy publishing. */

/** Absolute path to the WordPress directory. */
if (!defined('ABSPATH')) {
	define('ABSPATH', __DIR__ . '/');
}

/** Sets up WordPress vars and included files. */
require_once ABSPATH . 'wp-settings.php';
The code above is pretty much the default base wp-config.php file but we’ve added the Lando defaults for the database details. This will save us having to enter the database details later.
Next is the run step, This step happens after the environment is built and is running. This is when we want install WordPress.
We will do this using a bash script named run.sh that’s saved in a .lando directory. We put this in it’s own file because we need to write some if statements in our script, which isn’t supported in YAML.
Create a new directory called .lando, we’ll use this directory to store all Lando related files from now on.
Now create a file called run.sh and put the following in it.
if [ ! -d "./wp-admin" ]; then
	wp core download
fi

if ! $(wp core is-installed); then
	wp core install --url="http://$LANDO_APP_NAME.lndo.site" --title="WP Starter" --admin_user="admin" --admin_password="password" --admin_email="admin@$LANDO_APP_NAME.lndo.site" --skip-email
fi
We are doing two things here using the WP-CLI that’s included in our environment.
-
We are checking if wp-admin exists, if it does then there is a good chance WordPress is already downloaded so we don’t need to download it again.
-
We are checking if WordPress is installed, if not then we install it with some defaults.
-
--urlis the site url, we are using a default Lando environment variable here ($LANDO_APP_NAME). -
--titleis the site title -
--admin_userand--admin_passwordis the admin username and password, make these something more secure than what I’ve used please. -
--admin_emailsets the admin email and the--skip-emailflag stops WordPress from sending out a notification to the admin user.
-
This is also where copying the wp-config.php file is helpful, because we’ve done that we don’t need to worry about the database connection.
**WP-CLI**The WP-CLI is an amazing tool that can help you automate management of your sites. I highly recommend checking out the documentation and playing around with it if you haven’t already.
If you happened to have run lando start before, the build step won’t run again. Instead we can run lando rebuild to rebuild the environment, rebuilding the environment will trigger the build. lando rebuild will also start the environment up as well.
**lando destroy**You can also run
lando destroyto remove the containers and volumes, essentially blowing away the full installation, thenlando startwill start from scratch
We should get an output in the terminal that looks like this.
![A terminal window showing results of running lando rebuild in the terminal. It reads 'Name: my-wp-starter, Location: saved location of the project, Services: appserver_nginx, appserver, database, URLS: Appserver nginx urls: https://localhost:59622 [301], http://localhost:59622 [301],
http://my-wp-starter.lndo.site/ [200],
https://my-wp-starter.lndo.site/ [200]](/_astro/image.BMxPuraZ_2pk0Kv.webp)
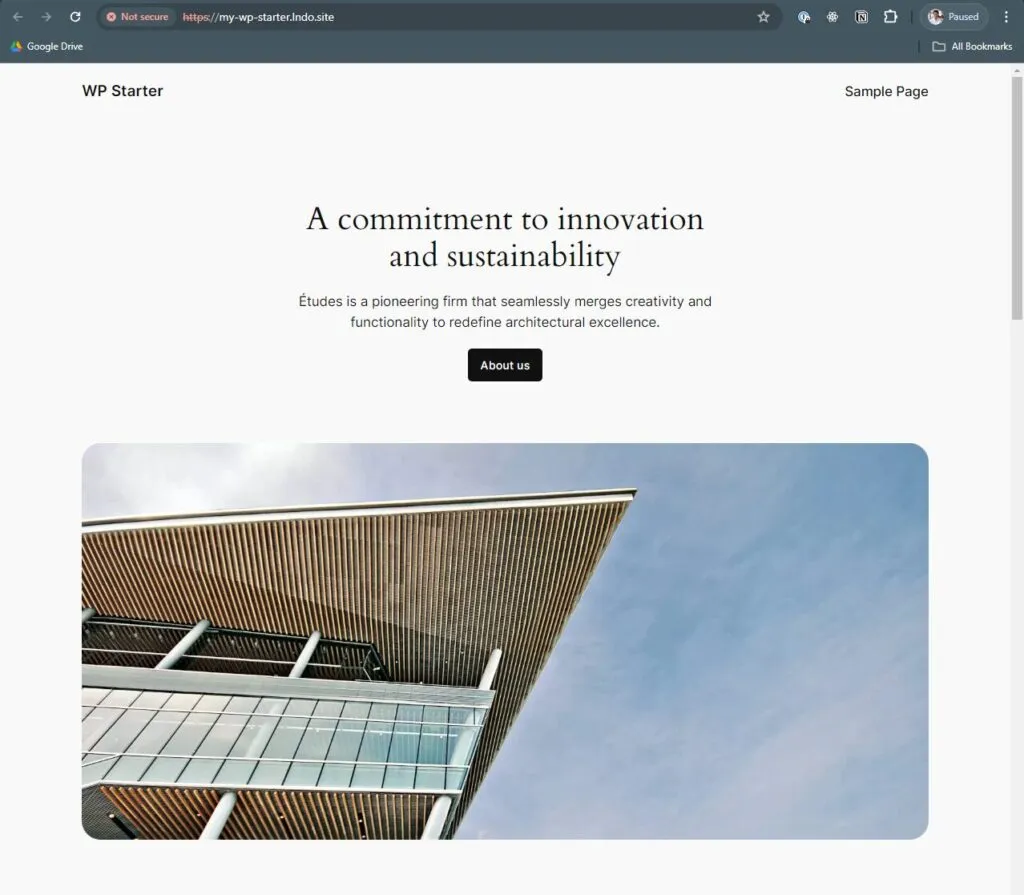
Open up one of the urls that end in ‘.lndo.site/’ and you should see you’re WordPress site.
You can now commit this to a repo and send it to everyone that needs a WordPress environment spun up.
But we’re not stopping here, we’re going to make it extra nice by adding a few more features.
Proxying to a ‘proper’ local environment
You might’ve noticed the url we got is ends in lndo.site, this is because Lando reverse proxies localhost to a *.lndo.site domain. But this means we need to use *.lndo.site domains for our local development. It also means we need to online in order to build.
We will be changing the url to use our own custom domain, this also means we are not reliant on Lando’s DNS so we can work offline.
To do this we will change our configuration in .lando.yml and add the custom domain to our hosts file.
Set up the proxy
Lando lets us set up proxies ourselves. We will proxy our Nginx service to resolve to our custom domain, which will be wp-starter.local.
Add the following to the .lando.yml file
proxy:
  appserver_nginx:
    - wp-starter.local
The .lando.yml file should look like this
name: my-wp-starter
recipe: wordpress
config:
  php: 8.2
  composer_version: 2
  webroot: .
  database: mysql
  cache: redis
  ssl: false
  via: nginx
  xdebug: true
services:
  appserver:
    build:
      - cp wp-config-local.php wp-config.php
    run:
      - .lando/run.sh
proxy:
  appserver_nginx:
    - wp-starter.local
Modify hosts file.
Now we’ll modify our hosts file to point 127.0.0.1 (localhost) to wp-starter.local. This will be different based on your OS, so I suggest looking up some instructions based on your OS.
Here’s what it looks like on my Windows machine.
127.0.0.1 wp-starter.localFinally, because we will be rebuilding this from scratch, we’ll need to change the run.sh script to install WordPress with our new domain.
Modify the run.sh script
Change the run.sh script we created earlier, from this:
if [ ! -d "./wp-admin" ]; then
	wp core download
fi

if ! $(wp core is-installed); then
	wp core install --url="http://$LANDO_APP_NAME.lndo.site" --title="WP Starter" --admin_user="admin" --admin_password="password" --admin_email="admin@$LANDO_APP_NAME.lndo.site" --skip-email
fi
To this:
if [ ! -d "./wp-admin" ]; then
	wp core download
fi

if ! $(wp core is-installed); then
	wp core install --url="http://wp-starter.local" --title="WP Starter" --admin_user="admin" --admin_password="password" --admin_email="admin@wp-starter.local" --skip-email
fi
With all of that done, we will blow away everything and start fresh. Run lando destroy --volumes. This will destroy the Docker containers and volumes, removing all data.
Then delete all of the files created during the WordPress installation. Your file structure should look like this:
.lando
- run.sh
.lando.yml
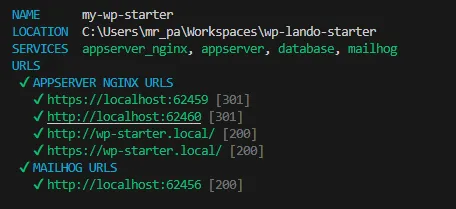
wp-config-local.phpNow run lando start and wait for the environment to spin up. You should see the new domain appear in the final output.
![A terminal window showing results of running lando rebuild in the terminal. It reads 'Name: my-wp-starter, Location: saved location of the project, Services: appserver_nginx, appserver, database, URLS: Appserver nginx urls: https://localhost:59665 [301], http://localhost:59666 [301],
http://wp-starter.local/ [200],
https://wp-starter.local/ [200]](/_astro/image-2.CuSy_cym_1YBPHY.webp)
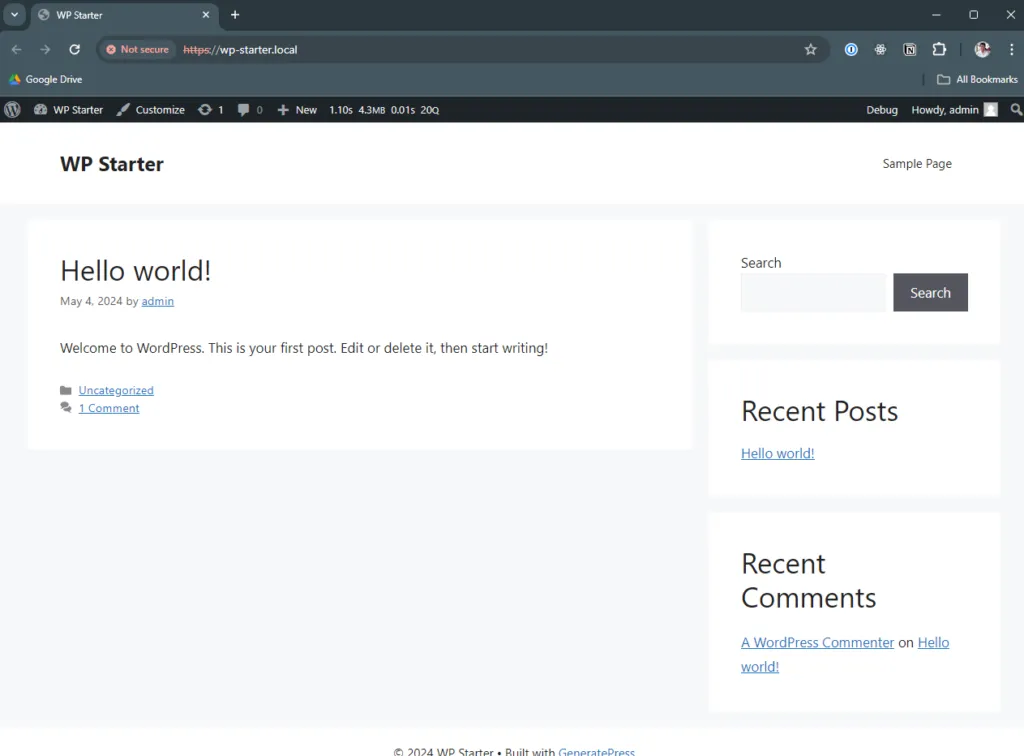
Click on that url and you should see your site running on the domain of your choice.
Manage plugins and themes with Composer
OK, so we’ve set up Lando to spin up a WordPress environment for us with some nice defaults, downloading and installing WordPress along the way. We then set it up to proxy a custom domain locally.
Take a break at this point, you’ve made some huge progress. Go get some coffee or do some jumping jacks :)
Once you’re done with your break, lets talk about managing plugins.
With our current setup, we can start building our site and installing plugins and themes all we want. But checking in every single theme and plugin we use for our site can make the project pretty big and we probably want to leave all of that ourside of our git repo.
What we can do instead is manage our plugins using Composer, a package manager built for PHP.
Head to the Composer website and download and install Composer, then come back and continue the tutorial.
Composer and WPackagist for WordPress
WordPress doesn’t have the best reputation for managing plugins and themes from a developer experience point of view, a lot of the times you manually install them and you check everything into version control. Or you manage them outside of version control and reinstall them everytime a new environment is set up.
WPackagist is a Composer repository that aims to solve this by mirroring the WordPress plugin and theme repositories.
This lets us install themes and plugins just we would for a php or npm package. The main advantage is that it puts this configuration into code, reducing clutter in our codebase while still making it easy to get multiple developers set up with the same plugins and themes.
Create the composer.json file
For our starter we will install two plugins, Debug bar and Query monitor. And also the GeneratePress theme using Composer.
The first thign to do is to create a composer.json file in the root of our project. Do that and add the following to it.
{
    "name": "ptd/wp-starter",
    "description": "My WP Starter",
    "repositories": [
        {
            "type": "composer",
            "url": "https://wpackagist.org"
        }
    ],
    "require": {
        "wpackagist-plugin/debug-bar": "1.1.4",
        "wpackagist-plugin/query-monitor": "dev-trunk",
        "wpackagist-theme/generatepress": "*"
    }
}
Now if you were to run composer install, Composer will to go to wpackagist.org and pull down the following:
-
Version 1.1.4 of the debug bar plugin
-
The latest version of the query monitor plugin
-
The latest version of the GeneratePress theme.
Composer will also save them in the correct locations automatically.
Automating with events
To automate this we can use events. Events in Lando are just like build steps, except they run every time the environment starts up. We want to do it here because the Composer.json file might change during development so we want to update it every time. If nothing has change then Composer is smart enough to not do anything.
We do this in pretty much the same way as before, using a bash script.
First, add the following code to your lando.yml file:
events:
  pre-start:
    - appserver: .lando/pre-start.sh
This will run the script found at .lando/pre-start.sh before our WordPress service (appserver) starts. We haven’t created this script yet so let’s do that now. Create the script inside the .lando folder and add this to it:
composer update

composer install
That’s it. All we had to add was the composer commands we want to run every time the environment starts up. We run update first to update the composer.lock file in case something had changed since the last time we ran composer install. We’ll get an error if we haven’t done this. Then we run composer install.
Now if you run lando start, the script will run and download the plugins and themes for you.
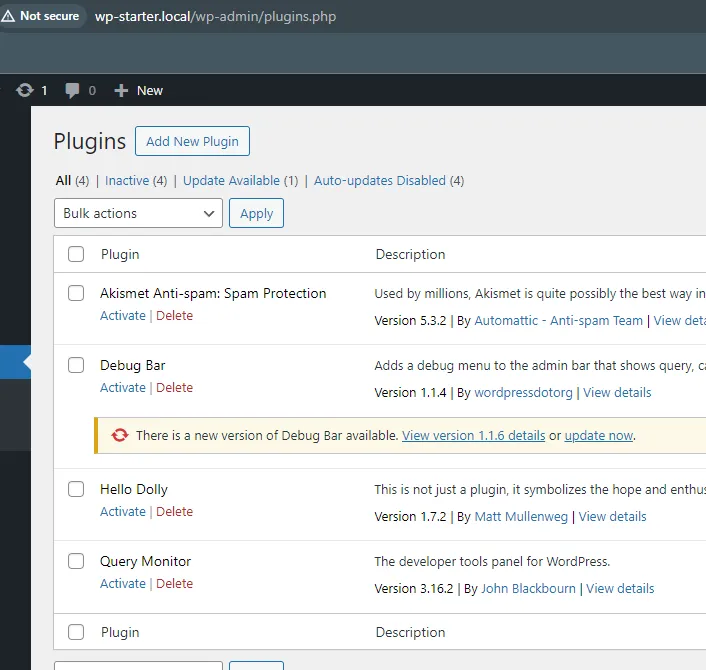
There is one little inconvenience though, Composer will only download and install the plugin for you, it won’t actually activate it.
We can automate this too by targeting a different event.
Add the following to the lando.yml under the events section of the file.
  post-start:
    - appserver: .lando/post-start.sh
It should look like this
events:
  pre-start:
    - appserver: .lando/pre-start.sh
  post-start:
    - appserver: .lando/post-start.sh
This will run the script found at .lando/post-start.sh after our WordPress service (appserver) starts. We run this after because we need WordPress up and running before activating any plugins.
Lets also create our post-start.sh script and add the following to it.
# Activate all other plugins
wp plugin activate --all
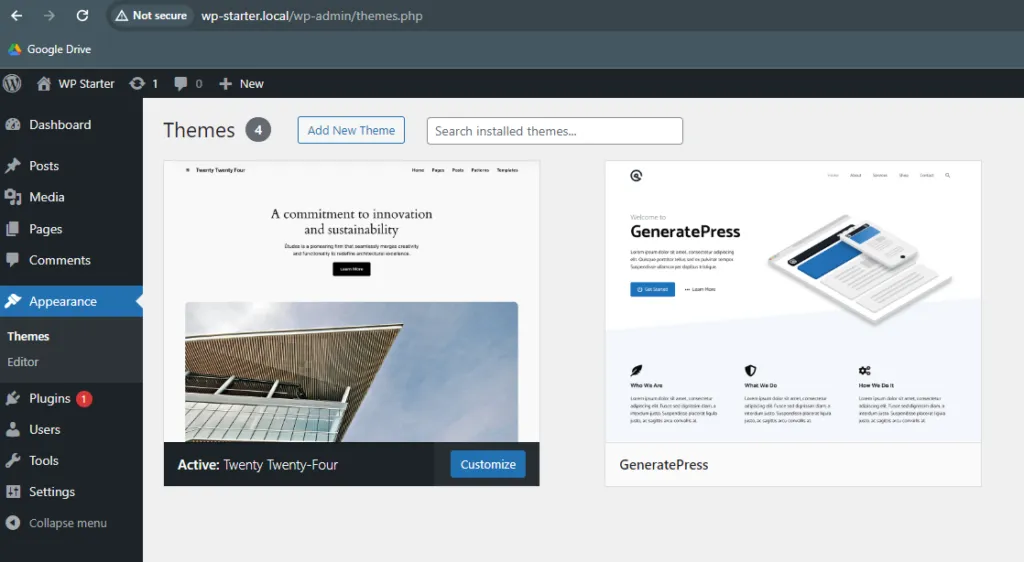
wp theme activate generatepressThis will use WP-CLI to activate all installed plugins and the GeneratePress theme.
Now whenever you start your environment, Lando will automatically install all plugins and themes in composer.json and activate them via the wp-cli. Saving you a couple of small but annoying steps. Yay for automation!
We’re very close now to finishing the environment but there is one more tool that I think is crucial for developing websites, and that’s Mailhog.
Adding Mailhog
Mailhog is an awesome tool you can use to trap any emails being sent by the website. This means you can use it to test outgoing emails without worrying about accidentally sending a bunch of emails to everyone in the world.
The first thing we need to do is add the service to our config. Add the following under the services key in the .lando.yml file
  mailhog:
    type: mailhog
    portforward: true
    hogfrom:
      - appserver
Let’s break this down.
-
We are creating a new service called ‘mailhog’.
-
typeis set to Mailhog because we are using the Mailhog service -
portforwardis set to true so we can access it externally in the browser. -
hogfromis set to the WordPress service (appserver) so it will capture emails from that service.
This is all we need to do for the .lando.yml file. The next thing we need to do is to create little plugin to tell WordPress to send emails through to our Mailhog service.
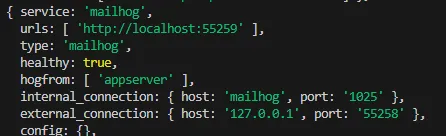
Getting Mailhogs internal connection information
We can use lando info to get the internal connection information for Mailhog. Find the internal_connection property and note down the host and port. We will use these in our code snippet.
Once you have that, create a new must use plugin and add the following code to it.
<?php
/*
Plugin Name: WP Starter
Description: A little utility plugin for the Lando development environment post.
Version: 1.0.0
*/

function wpStarter_forceEmailToMailhog($phpmailer)
{
    if (getenv('LANDO')) {
        $phpmailer->IsSMTP();
        $phpmailer->Host = 'mailhog';
        $phpmailer->Port = 1025;
        $phpmailer->Username = '';
        $phpmailer->Password = '';
        $phpmailer->SMTPAuth = true;
    }
}
add_action('phpmailer_init', 'wpStarter_forceEmailToMailhog');
The plugin hooks into the ‘phpmailer_init’ hook and changes where the WordPress phpmailer is sending outgoing email to. We also check if the LANDO environment varaible exists as a safeguard because we don’t this to run in production.
$phpmailer→Host should be the host you noted.
$phpmailer→Post should be the port you noted.
Run lando start and Lando should install and set up the new Mailhog service. Once that’s all done, you should get a new url you can go to and see MailHog running.
To test the service, create a new user in WordPress and you should see the confirmation email appear in MailHog.

And we’re done!
That’s it, you should now have a nice WordPress dev environment that’s quick to get running, is repeatable and easy to share. I highly recommend exploring the Lando documentation and customising this further to really make it work for you.
The full code for this can also be found on Github.